


The reliability of brakes is crucial for the safe operation of any vehicle, particularly for trailers that carry heavy loads. Emergency brake systems play a vital role in ensuring that trailers can come to a complete stop, even in the event of a primary brake failure. Therefore, regular inspection and maintenance of these systems are essential to maintain safety standards and prevent accidents on the road.
Understanding the functions and components of emergency brake systems is the first step toward effective maintenance. These systems typically include features such as electric or hydraulic actuators, brake drums, and emergency brake cables that work in tandem to engage when necessary. Regular checks for wear and tear, alignment, and functionality can significantly contribute to the longevity of both the brakes and the trailer itself.
In this guide, we will outline step-by-step procedures for inspecting and maintaining emergency brake systems specifically designed for trailers. By adhering to these practices, trailer owners can ensure that they are prepared for any unexpected situations, thereby enhancing road safety and improving overall vehicle performance.
How to Properly Inspect E-Brake Functionality in Vehicles
Inspecting the electronic brake (e-brake) functionality is crucial for maintaining vehicle safety and performance. Follow these steps to ensure the e-brake operates effectively, especially for vehicles and trailers that often carry heavy loads.
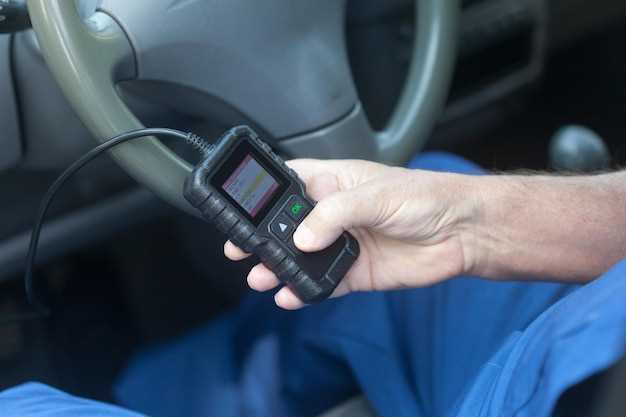
1. Visual Inspection: Start by visually examining the e-brake system components. Look for any signs of wear, corrosion, or damage on the cables, levers, and connections. Pay attention to the brake pads and rotors for uneven wear, which could indicate problems with the e-brake system.
2. Check the Activation: Engage the e-brake while the vehicle is in park. Ensure that the lever or pedal moves smoothly and that the indicator light on the dashboard illuminates if applicable. If the e-brake does not activate easily or the light fails to illuminate, there may be an issue that requires further attention.
3. Functionality Test: With the vehicle on a slight incline, apply the e-brake. Release the regular brakes and ensure the vehicle remains stationary. If it rolls, the e-brake may not be functioning properly and should be inspected more closely.
4. Adjust Cable Tension: Check the tension of the e-brake cables. Proper tension is necessary for effective braking performance. If the cables are too loose or too tight, they may need adjustment to restore proper function.
5. Examine the Alignment: Inspect the alignment of the e-brake components. Misaligned parts can hinder the system’s effectiveness. Ensure that all components, including drums or discs, are correctly positioned and securely fastened.
6. Road Test: After all checks, conduct a road test. Utilize the e-brake while driving at low speeds. Listen for any unusual noises and observe if the braking action feels consistent. Any abnormalities should be investigated immediately.
7. Regular Maintenance: Schedule regular inspections as part of your overall brake maintenance. This includes checking the fluid levels and ensuring the e-brake system is free from dirt and debris that could impede its function.
Regularly inspecting the e-brake functionality helps ensure safety for both vehicle and trailer operations. If issues are detected during any of these checks, consult a professional mechanic for a thorough evaluation and necessary repairs.
Key Steps for Maintaining Trailer Brake Systems for Optimal Safety

Regular maintenance of trailer brake systems is essential for ensuring safety on the road. To maintain optimal performance, follow these key steps diligently.
First, conduct a visual inspection of all brake components, including brake drums, linings, and shoes. Look for signs of wear, damage, or corrosion. Replace any worn or damaged parts immediately to prevent brake failure.
Second, check the brake fluid levels regularly. Low brake fluid can lead to compromised braking performance. If fluid levels are low, inspect for leaks in the system and refill as necessary with the recommended brake fluid type.
Third, inspect the electrical connections for the trailer’s brake lights and brake controller. Ensure all wiring is intact, secure, and free from corrosion. Test the brake lights and controller functionality to confirm that they respond properly when activated.
Fourth, examine the brake actuator for proper function. Ensure it engages and disengages smoothly, and perform any necessary repairs or replacements. Additionally, verify that the actuator is properly lubricated to avoid mechanical issues.
Fifth, pay attention to the adjustment of the trailer brakes. Ensure that they are properly adjusted according to manufacturer specifications. Incorrectly adjusted brakes can lead to uneven braking and increased stopping distances.
Lastly, schedule professional inspections at least once a year or before long trips. A qualified technician can provide a thorough assessment and identify potential issues that may not be visible during regular checks.
By adhering to these steps, you can significantly enhance the safety and reliability of your trailer brake systems, ensuring peace of mind during travel.
Common Issues with Emergency Brake Systems and How to Troubleshoot Them
Emergency brake systems, particularly in trailers, are essential for ensuring safety during unexpected stops. However, these systems can face several common issues that may impede their functionality. Understanding how to troubleshoot these problems can prevent potential accidents and ensure a secure towing experience.
One of the most frequent problems is insufficient pressure in the e-brake system. This may occur due to a leak in the brake lines or a damaged actuator. To troubleshoot, inspect the brake lines for any visible leaks or wear. Ensuring that the actuator is operating correctly is also crucial; a malfunctioning actuator should be replaced to restore full functionality.
Another common issue is the buildup of debris or rust on the brake components. This can cause the e-brake to become unresponsive or sluggish. Regular cleanliness checks should be performed. Remove any dirt or rust from the brake pads and the drums, and apply appropriate lubricants to moving parts to maintain smooth operation.
Worn or damaged brake pads can also lead to decreased braking effectiveness. Inspect the pads frequently for signs of wear. If the thickness is less than the manufacturer’s specifications, it’s advisable to replace them immediately to ensure optimal safety.
Additionally, the e-brake cable can experience stretching or fraying over time, leading to improper tension and responsiveness. Examine the cables for any signs of damage and ensure they are properly adjusted. If any fraying is detected, the cable should be replaced without delay to maintain system integrity.
Finally, electrical issues can also affect electronic emergency brake systems. If the e-brake light on the dashboard remains illuminated or the system fails to engage, inspect the electrical connections and fuses for any malfunctions. Repairing or replacing faulty components can restore the system to full working order.
Regular inspections and timely troubleshooting of these common issues can significantly enhance the performance of emergency brake systems in trailers, ultimately ensuring safer journeys.


