


Maintaining the performance of your vehicle’s brakes is crucial for safety, especially for those who rely on a truck for daily tasks or transportation. Over time, brake fluid can absorb moisture and contaminants, leading to reduced effectiveness and potential brake failure. This guide provides essential information on the importance of proper brake fluid replacement and effective flushing techniques.
Neglecting to replace the brake fluid can cause various issues, including decreased braking response and potential damage to brake components. Understanding when and how to flush your system is vital. Regular maintenance ensures that your brakes operate efficiently, allowing for optimal performance and safety on the road.
In this article, we will explore the signs that indicate your brake fluid needs replacing, the materials required for a thorough brake fluid flush, and step-by-step instructions to perform the task correctly. By following these guidelines, truck owners and drivers alike can ensure their braking systems remain in peak condition, enhancing both safety and performance.
Identifying the Right Type of Brake Fluid for Truck Maintenance
Choosing the correct brake fluid is crucial for effective truck maintenance. Different types of brake fluids are designed to meet specific performance standards, ensuring the safety and reliability of braking systems under various conditions. The primary types of brake fluid include DOT 3, DOT 4, DOT 5, and DOT 5.1.
DOT 3 and DOT 4 are glycol-based fluids and are commonly used in many trucks. They have a lower boiling point that can lead to brake fade under extreme conditions. However, they are easily compatible with conventional brake system components. DOT 3 is suitable for light-duty trucks, while DOT 4 offers higher performance characteristics, making it a better choice for heavier loads or demanding driving styles.
DOT 5 is a silicone-based fluid and is often utilized in specialty applications, such as military vehicles. It is not compatible with ABS systems and should not be mixed with glycol-based fluids. For trucks equipped with modern braking systems, DOT 5.1 is recommended as it combines the advantages of both glycol and silicone, offering higher boiling points and excellent moisture resistance.
Another critical factor to consider is the fluid’s boiling point rating. The higher the boiling point, the better the fluid can withstand heat generated during braking. It is essential to check the manufacturer’s specifications for the truck to ensure compatibility with the recommended fluid type.
Regularly inspecting and replacing brake fluid is vital in maintaining optimal performance. Contaminated or old fluid can compromise the braking system’s efficiency, leading to potential hazards on the road. Always follow guidelines for proper fluid replacement and ensure that the type of brake fluid used matches the truck’s requirements.
Step-by-Step Process for Flushing Brake Fluid in Trucks

Flushing brake fluid is essential for maintaining optimal braking performance in trucks. Follow these precise steps to ensure a thorough and effective fluid replacement.
1. Gather Necessary Tools and Materials: Before starting the process, collect all required tools including a wrench for the bleeder screws, a vacuum brake bleeder or a clear tube, a brake fluid container, and the appropriate brake fluid for your truck.
2. Prepare the Truck: Park the truck on a level surface and ensure the engine is off. Engage the parking brake to keep the vehicle secure during the operation. Remove the wheel covers, if applicable, to access the brakes more easily.
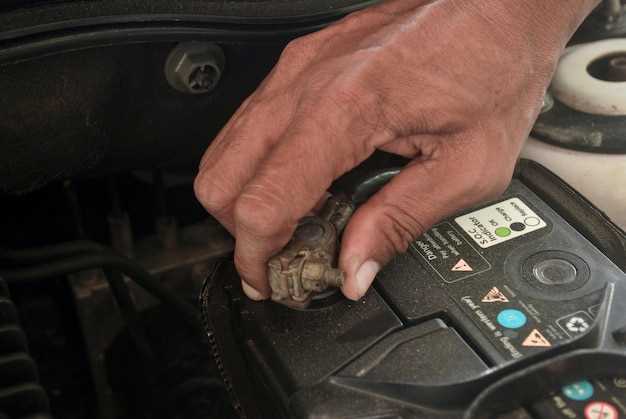
3. Locate the Brake Fluid Reservoir: Open the hood and find the brake fluid reservoir. It is typically located near the back of the engine bay, labeled clearly. Remove the cap and inspect the fluid condition before flushing.
4. Start with the Furthest Brake from the Master Cylinder: Begin the flushing process at the wheel furthest from the master cylinder, usually the rear passenger side. Attach the clear tube to the bleeder valve, placing the other end into a container to catch the old fluid.
5. Bleed the Brakes: Have an assistant pump the brake pedal several times and hold it down. While they maintain pressure, open the bleeder valve to allow old fluid to escape. Close the valve before your assistant releases the brake pedal to prevent air from entering the system. Repeat this process until you see clean new fluid flowing through the tube.
6. Repeat for Each Wheel: Move to the next wheel in this order: rear driver side, front passenger side, and finally front driver side. Ensure each wheel is flushed thoroughly until fresh brake fluid is visible.
7. Refill the Brake Fluid Reservoir: After flushing all four wheels, check the fluid level in the reservoir. Add new brake fluid as needed to reach the recommended level. Be sure to use the type of fluid specified for your truck.
8. Test the Brakes: Once the process is complete, replace the reservoir cap securely. Before driving, pump the brake pedal a few times to ensure that the brake system builds pressure. Check for any leaks around the wheels and ensure proper brake engagement.
9. Dispose of the Old Fluid Properly: Dispose of the old brake fluid responsibly, following your local regulations for hazardous waste. Do not pour it down the drain or onto the ground.
This step-by-step process will help keep your truck’s brake system functioning properly by ensuring fresh brake fluid is circulating through the lines, thus providing reliable stopping power.
Common Mistakes to Avoid During Brake Fluid Replacement
When replacing brake fluid in a truck, it’s crucial to avoid several common mistakes to ensure the brakes function safely and effectively. One significant mistake is neglecting to identify the correct type of brake fluid for the vehicle. Using incompatible fluid can lead to damage and decreased performance of the braking system.
Another frequent error is not fully flushing the old fluid from the system. Failing to remove all the old fluid can result in a mixture that compromises the performance due to moisture or contamination. Proper flushing requires attention to detail and may involve using a brake bleeder kit to ensure thorough removal of the old fluid.
Improper bleeding of the brakes is also a common pitfall. When air remains in the brake lines, it can create a spongy feel when applying the brakes. It’s essential to follow the correct bleeding sequence outlined in the vehicle’s manual, and to be patient during the process to allow all air bubbles to escape.
Another mistake is overlooking the condition of the brake components during fluid replacement. Inspecting brake pads, rotors, and lines for wear or damage is vital, as these could affect braking performance. Neglecting these checks can lead to unsafe driving conditions following a fluid replacement.
Lastly, failing to securely close the reservoir and check for leaks can lead to additional problems. After replacing the brake fluid, always ensure the reservoir cap is tight and monitor for any signs of leakage over the following days. Taking these precautions helps maintain the integrity of the brake system and ensures safe driving. By being aware of these common mistakes, truck owners can ensure their vehicles are equipped with reliable brake performance.


